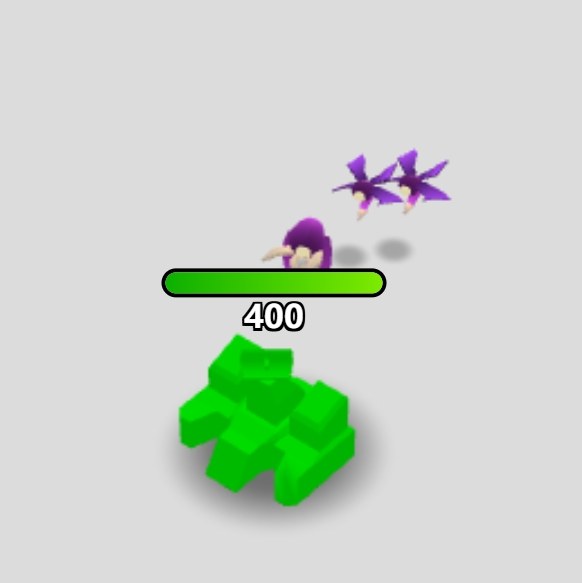
Defender Master1 is a lean, unforgiving browser tower defense game where you optimize tower placement for path coverage overlap rather than raw damage. It suits genre veterans who enjoy fast-paced, self-contained puzzle maps without story or meta-progression. Expect a steep difficulty curve, tight economy, and a pure focus on tactical decision-making.
First Minute on the Map
You open Defender Master1 and the initial field is deceptively calm. A winding dirt path cuts through green terrain, one tower slot sits near a bend, and a handful of coins glint in the corner. The first wave button pulses, you tap it, and three stubby little enemies shuffle out. Your basic arrow tower plinks away. They drop. You get more coins. For about forty seconds, you think you've figured out the entire game. Then wave four arrives and suddenly two lanes activate at once, a fast runner zips past your lone tower, and a life blinks red and vanishes. That's the real introduction. It doesn't wait politely for you to catch up.
The game telegraphs very little. No pop-up tutorial character, no arrow pointing at the upgrade button. You learn by losing a life and thinking "okay, I won't let that happen again." The soundtrack is minimal, almost ambient, which means you hear every arrow hit and every death sound. Those audio cues start mattering more than you'd expect when you're scanning three spots at once.
What You're Actually Optimizing For
Tower defense veterans will recognize the core loop immediately. Enemies follow set paths. You place towers adjacent to those paths. Towers attack automatically. Enemies have different movement speeds, health pools, and occasionally resistances. Kill them before they reach the exit. Standard stuff. But Defender Master1 pushes you toward a specific optimization that isn't about raw damage output.
You're optimizing for path coverage overlap. Placing your strongest tower at the final choke point feels correct early on, and it works through maybe wave twelve. After that, enemies arrive in mixed groups: a slow tanky front-liner absorbing hits while three quick flankers slip through behind it. If all your high-damage towers are clustered at one bend, the fast units simply outrun their targeting cycles. I lost three runs before I realized I needed a "catcher" tower — something with a slow effect or high attack speed — positioned about a third of the way into the map, specifically to shave speed off the runners before they hit my kill zone.
The economy layer is tighter than it first appears. Coins come from kills and wave completion bonuses. You can sell towers for a partial refund, which sounds generous until you do the math and realize you're losing roughly thirty percent each time. That penalty means every placement decision carries weight. You can't just spam and reposition endlessly. I found myself staring at the upgrade tree for a solid minute on wave eighteen, trying to decide whether two level-three archers would outperform one level-four cannon. The answer changed depending on the map's path geometry.
Where Runs Go Wrong, Fast
After about fifteen runs, I started cataloguing my own failure patterns. The most common killer wasn't a specific enemy type or wave. It was over-upgrading one tower too early. You see a juicy "level 4" button, you click it, and suddenly you've spent 180 coins on a single point of the map. Then wave sixteen sends enemies down three lanes simultaneously and your god-tier tower can only cover one. You hemorrhage lives while your other two lanes sit empty. I did this three times before the lesson stuck.
The second mistake: ignoring tower placement order on multi-entrance maps. Defender Master1 doesn't always spawn enemies from one direction. Some maps add a second entrance around wave eight without much fanfare. If you built your entire defense facing north, the east entrance will wreck you before you can scrape together enough coins for a new tower. The minimap shows entrance points from the start, but it's easy to tunnel-vision on the first active lane. I now pause on wave one of any new map and trace every path with my eyes before placing anything.
A subtler trap involves the upgrade tree's hidden synergies. Certain tower types gain bonus effects when placed near others of the same category. The game doesn't surface this clearly. I stumbled onto it when I noticed a mage tower was firing slightly faster next to another mage tower. Testing confirmed a range bump too. If you spread your towers across too many types, you miss these adjacency bonuses entirely. Specializing in two or three types per run tends to outperform the "one of everything" approach.
Wave composition also punishes complacency. Around wave twenty-two, enemies start appearing with shields that absorb a set number of hits regardless of damage. Your slow-firing, high-damage cannon becomes nearly useless against them. You need rapid-fire towers to strip shields fast. I didn't scout enemy types between waves — you can tap incoming wave icons to preview — and paid for it with a full restart. Now I check every preview.
Phone vs Desktop: The Feel Changes
I played Defender Master1 on both a mid-range Android phone and a standard laptop browser. The experience diverges in ways that affect higher-level play.
On desktop, the mouse gives you precise tower placement. You can click exactly on the grid square you want, even when towers are clustered tightly. Hotkeys for upgrading and selling (typically 1-4 and backspace, though the game doesn't advertise these) speed up mid-wave decisions significantly. The larger screen also makes the minimap more legible, which matters when you're tracking multiple active lanes. I found desktop the better environment for first-clearing difficult maps, simply because I could react faster.
On mobile, the touch interface introduces a small but meaningful friction. Tower placement requires a tap-and-drag or double-tap that occasionally misregisters when your finger covers the grid. I placed at least two towers one square off from my intended spot during my phone sessions. The upgrade menu also occupies more relative screen space, partially obscuring the battlefield during critical moments. You can mitigate this by pausing before upgrading, and the game does allow pausing, which feels almost necessary on a smaller screen. Battery drain was modest — a twenty-minute session took about eight percent — and the game ran smoothly without frame drops even during wave thirty-plus with dozens of projectiles on screen.
Neither version is broken. But if you're pushing into the harder maps where one misclick costs a run, desktop offers a cleaner margin for error. If you only have a phone, pausing liberally and zooming when possible (pinch-to-zoom works on most maps) will keep frustration manageable.
Who Should Actually Play This
Defender Master1 sits in a specific niche within the tower defense genre. It's not the gentlest entry point for someone new to TD games. The difficulty curve steepens sharply around wave fourteen, resource management punishes indecision, and the lack of hand-holding assumes you understand concepts like damage types, path blocking, and sell-back economics. If you've never played a tower defense game before, you'll likely bounce off after a few failed runs and feel like the game is unfair. It's not unfair, but it is unforgiving.
For players who've exhausted something like Kingdom Rush and want a leaner, faster-paced challenge without narrative fluff, this clicks hard. The maps load quickly, waves come with minimal downtime, and the upgrade tree offers enough depth to reward experimentation without sprawling into analysis paralysis. You can finish a full map attempt in fifteen to twenty minutes, which makes it easy to slot into a break.
I'd recommend skipping if you prefer story-driven progression or gradual power accumulation across runs. Defender Master1 doesn't have a meta-progression layer that I could find — no persistent XP, no unlockable towers between maps. Each map is a self-contained puzzle. Your only carryover is your own improved decision-making. That purity appeals to me, but it might feel thin if you're chasing a sense of long-term growth.
Also worth noting: the game runs entirely in a browser without downloads or accounts. You open a tab, you play, you close it. That frictionless access pairs well with the short session length. I found myself returning not because of a daily reward prompt, but because I had fifteen minutes and wanted to crack a map that had killed me the day before.
A 10-Minute Practice Plan That Actually Builds Skill
If you're past the early waves but keep hitting a wall around the mid-teens, here's a focused ten-minute drill I used to stop bleeding lives. It's not about grinding — it's about isolating specific skills that compound.
- Minutes 0–2: Map scanning drill. Load any map you haven't beaten. Don't place a single tower. Just start wave one and watch the enemy path for the full wave. Note every entrance, every intersection, and every long straightaway. Long straights are where ranged towers get maximum uptime. Intersections are where area-of-effect towers shine. Draw an imaginary line where enemies spend the most time on screen. That's your primary kill zone. Write nothing down — just hold it in your head.
- Minutes 2–5: Two-tower test. Restart. Place exactly two towers before wave one: one at the start of the path, one near the end. Make them different types. Watch how they interact. Does the front tower soften enemies so the back tower finishes them? Does the back tower get overwhelmed because the front one lacks damage? This exercise exposes range overlap and kill-chain timing. The goal isn't to win, it's to see the relationship. Let the run die if needed.
- Minutes 5–8: Upgrade threshold check. Restart again. This time, don't upgrade any tower until you have at least 200 coins banked. Play waves with base-level towers only. You'll probably leak some lives. That's fine. The point is to feel exactly when base towers stop being sufficient. That threshold — usually around wave nine or ten — is your upgrade timing signal for future runs. Knowing when to upgrade matters more than knowing what to upgrade.
- Minutes 8–10: Sell discipline drill. Continue from wherever the last drill left off. Pick one tower you placed early and sell it. Just one. Use the refund to upgrade a different tower or place a new one in a better position. Observe whether the map position you abandoned creates a vulnerability. This teaches you which towers are load-bearing and which are luxuries. Most players, myself included, overvalue keeping everything they've placed. Learning to cut a weak tower before it becomes a liability saves runs.
Ten minutes, four short exercises, no pressure to clear the map. I did this twice across two different maps and immediately noticed I was making faster, cleaner decisions in full runs. The scanning habit alone prevented two early deaths on a map with a hidden third entrance I'd missed completely on my first attempt.
Defender Master1 rewards that kind of deliberate attention. It's not a game that wants you to zone out and watch numbers go up. It wants you to notice the runner slipping past, remember it, and place your next tower three pixels left. If that sounds satisfying, you'll lose hours here. If it sounds like work, the game won't change your mind.